This Week’s edition comes with special support from our friends at Karl Storz. More about them later.
A few weeks ago in a much loved post about the Sanjay Patel Classification of Adenomyosis, we promised to come back with the surgical methodology to perform the myomectomy. Today is that day.
For a quick recap, clinically speaking, uterine adenomyosis is a disorder in which endometrial glands and stroma are present within the myometrium (uterine musculature), resulting in hypertrophy of the surrounding myometrium. Women with symptomatic adenomyosis present with uterine enlargement, abnormal uterine bleeding, and painful menses. Consideration of adenomyosis is part of the evaluation of these symptoms.
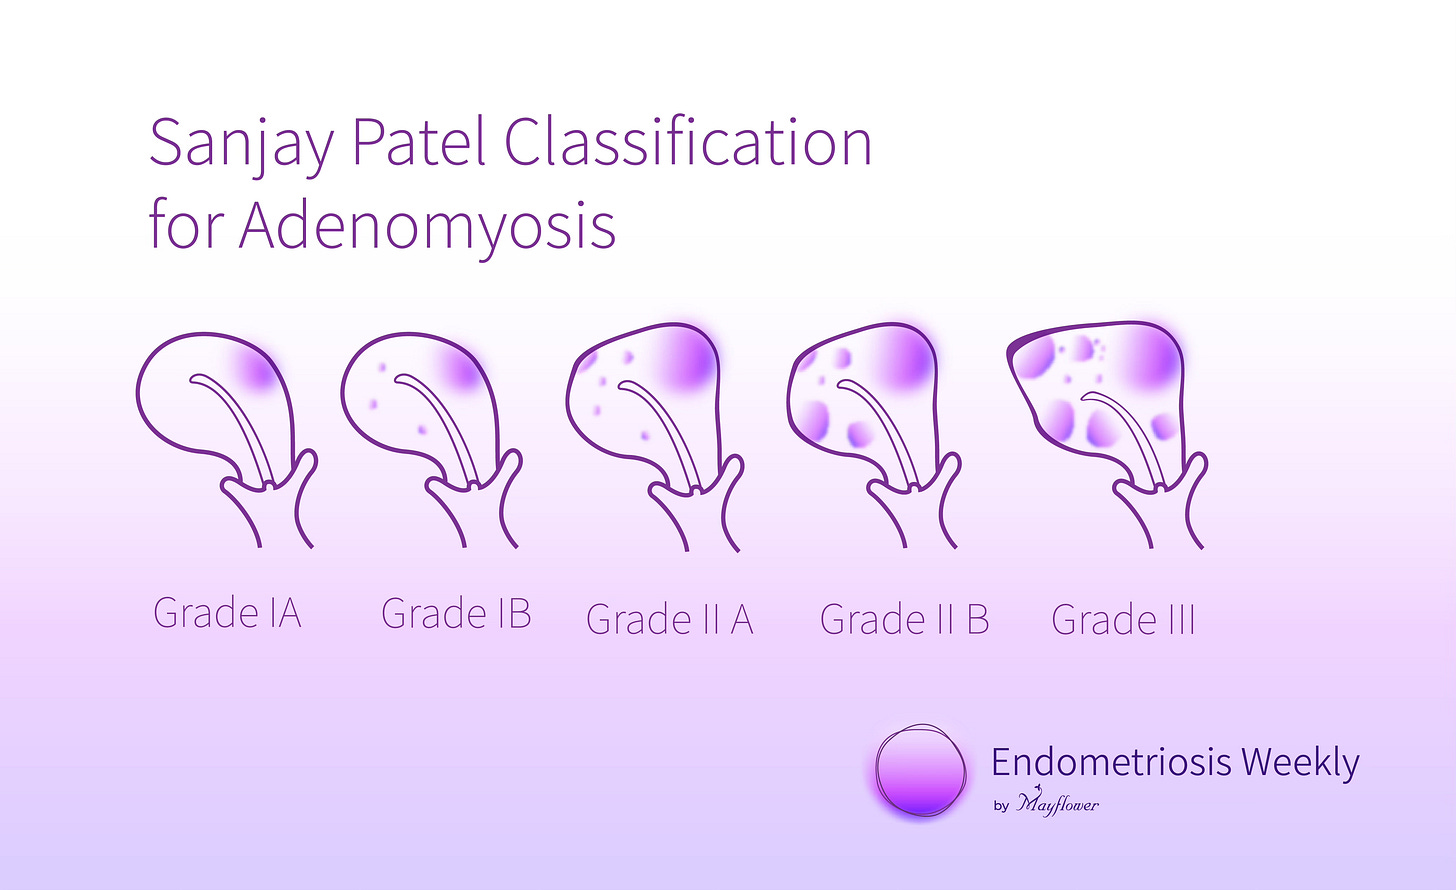
We also saw the grades of Adeonomyosis under the Sanjay Patel classification from I through III
An MRI combined with a USG quickly aids us in locating the size, intensity and vascularity (from a colour doppler) of the inflamed mass.
Three surgical methods are used to resect the mass that forms as a result of Adenomyosis
Hood technique
Elliptical technique
Splice technique
The most commonly performed technique is the elliptical technique for adenoma resection. The disease typically extends into the retro-uterine region, and we are trying to resect two wedge shaped aspects from the affected region along with some margin so as to truncate the impact of the incision deeper while cutting across a wider part on the surface.
It really crude terms, it’s like taking the wedge out of a sphere. Something like this

Intra-operative Mapping
Before proceeding to adenoma resection, me make sure all the parenchymal tissue, adhesions and endometriosis plaque have been removed. Once the entire region surrounding the adenoma is dissected off we go for begin the intra-operative mapping of adenoma via a trans vaginal USG. This is the time we access the adenoma with clarity and then proceed with our surgery.
The USG is correlated with what we see through laparoscopy and clear margins on where the resection needs to be conducted, defined.
Surgical Goal and Purpose
The surgical goal of the procedure is to provide the patient with pain relief, and improve their genitourinary tract scores. Resection helps us in doing so, improving the symptoms by reducing the uterine adenomyotic mass (plaque) and vascularity, thus improving pain, menorrhagia and fertility.
With this goal squarely placed in our heads, we begin the surgery.
The Elliptical technique leverages the idea that disease involvement is low closer to the cavity of the uterus and higher towards its periphery. In other words, the disease is radial. Therefore, surgery should also resect wider on surface and narrower near the cavity. Let’s get started.
Step 1: The Midline Incision
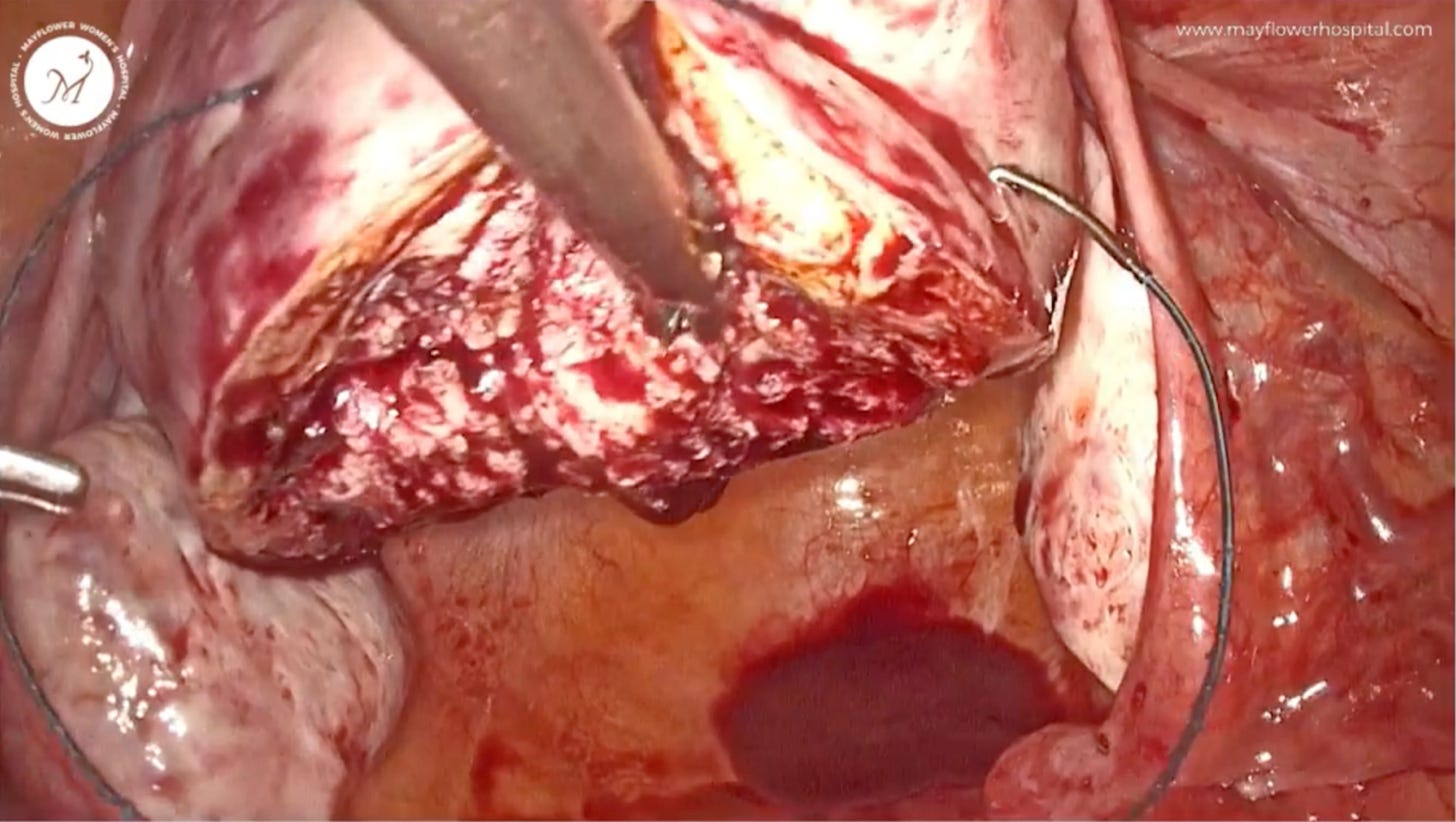
The image that you see above is one from 2008. A lot has changed since then but at Mayflower, we’ve been ardent users of Karl Storz’s vision systems. Below is an image from a much more recent time. You can clearly see the evolution and transformation that clear visualisation has brought to practice of laparoscopic surgery.
The vasculature around the uterus can be visualised far better and the impact of the incision is also clearly visual as opposed to the image above.
You can read more about their Image 1 S Rubina systems here
Back to our surgery, with a nice clean modern day view.
A central midline incision, deep in nature, is placed creating a cleft right in the middle of the diseased mass.
Step 2: Deepen the incision upto a fresh margin
This incision is deepened to the point that we delineated through our USG and visually confirm as the internal margin of the disease. It’s often difficult to tell when the disease ends and healthy tissue begins but with enough surgeries, that margin starts to show more clearly, both visually, as well as through how it behaves upon contact with the energy source.
Once we’ve reached a fresh margin inside the myometrium, we retract back and begin placing the peripheral incision.
Step 3: Peripheral Incision
We move to the outer lateral edge of the disease and place our peripheral incision. It’s important to note here that the z-axis orientation of both the midline and peripheral incision needs to insert at the same point in the centre to form a perfect wedge.
It’s advised to use a manipulator, and turn the uterus such that you are in a comfortable place to make the incision. Ensure that you are moving radially inwards while placing the incision.
If we do it right, we get a clear wedge shaped cut out of the disease. You can see the radial nature of the disease growth and vascularity clearly in this excised mass.
This always reminds me of the potato wedges you get in restaurants.
Step 4: Rinse and Repeat for the other side
You might lose some control on the uterus if you hold it medially so it’s best to first firmly hold the organ and only then start dissecting. Stability is key in getting a clean cut.
Protip
Adenoma presents minimal bleeding upon dissection, so if you surgeon encounter more bleeding while resecting then you may have entered the healthy myometrium. The aim of resection is to reduce tension( of adenoma plaq ) in myometrium which can be achieved by de-bulking the affected myometrium which can sometimes be upto 50% of the total depth of the uterine wall.
Step 4: Suturing
Firm suturing, and proper approximation is what helps the healing process happen neatly. We use V loc sutures in a continuous non-locking fashion.
Tip: Taking the peripheral chunk instead of the middle chunk helps in better approximation of the tissue from the lateral aspect towards the center.
It’s just like a shoe lace from a Nike AirForce 1 — outside in first, and then inside out. If we go too deep though, we might end up popping the core out when the suture is tightened so stay on the periphery for a good approximation aka a clean closed door appearance.
And that’s it! Voila! You have a working uterus again.
Would you like us to write about the hood and the splice technique as well? Drop in a word in the comments along with thoughts and questions about this edition. We always love hearing from you.
See you next week!


